يعد Windows 10 أحد أكثر إصدارات Windows المتوقعة من Microsoft. على الرغم من أن Windows 8 ابتكر اتجاهًا جديدًا في عالم نظام تشغيل سطح المكتب ، إلا أنه واجه بعض المشكلات في التصميم والأداء التي كانت محور التركيز الرئيسي لشركة Microsoft في Windows 10. لذلك ، تم الكشف عن Windows 10 Final Build في 29 يوليو 2015 لسطح المكتب باعتباره وكذلك الهواتف الذكية.
لقد تضمنت الكثير من التعديلات من خلال مراعاة عيوب Windows 8. في الواقع ، إنه إصدار متقدم من Windows ولكن لا يزال هناك عدد من النتائج التي تحدث كل يوم مع مستخدمين مختلفين.
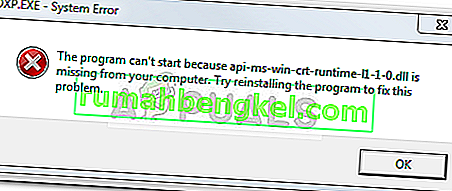
جزء كبير من هذه العواقب هو الأخطاء التي تظهر عند محاولة القيام بمهمة معينة. لقد وصل عدد من الأشخاص عبر رسالة خطأ أثناء محاولة فتح برامج ومتصفحات مختلفة داخل Windows 10. يأتي هذا الخطأ مع رسالة خطأ تفيد بأن التطبيق لم يتمكن من بدء التشغيل بشكل صحيح (0xc0000005). انقر فوق "موافق" لإغلاق التطبيق . يحدث هذا الخطأ عادةً مع متصفحات الإنترنت ولكنه لا يقتصر على هذه. يمكن أن يتوقف أي تطبيق داخل Windows عن الاستجابة بسبب هذا الخطأ. لذلك ، يجب إصلاحه لإعادة تلك البرامج الأساسية إلى العمل.

11/12/2016: أبلغ المستخدمون أن الطرق المذكورة أدناه ستعمل أيضًا على Windows 7.
السبب وراء خطأ Windows 10 0xc0000005:
هناك عدد من الأسباب المعروفة التي تسبب هذا الخطأ لإزعاج عمليات البرامج المختلفة في Windows 10. أحد هذه الأسباب التي تعتبر سببًا رئيسيًا هو وجود برنامج مكافحة فيروسات تابع لجهة خارجية يتسبب في حدوث تعارض مع الملفات القابلة للتنفيذ والتأثير على عملياتها. من ناحية أخرى ، يمكن أن تتلف السجلات بسبب البرامج الضارة والفيروسات التي تتسبب في تصرف البرامج بشكل غير طبيعي. في بعض الأحيان ، يمكن أن تكون برامج تشغيل الأجهزة السيئة هي السبب في حدوث هذا الخطأ.
حلول لإصلاح خطأ Windows 10 0xc0000005:
بناءً على الأسباب المذكورة أعلاه ، فإن الحلول مباشرة. لذلك ، اتبع الطرق التالية للتخلص من رسالة الخطأ المحبطة هذه.
إصلاح ملفات النظام الفاسدة
قم بتنزيل Restoro وتشغيله لفحص واستعادة الملفات التالفة والمفقودة من هنا ، بمجرد الانتهاء من متابعة الحلول أدناه. من المهم التأكد من أن جميع ملفات النظام سليمة وغير فاسدة قبل متابعة الحلول أدناه.
الطريقة الأولى: إصلاح برنامج مكافحة الفيروسات
يمكن أن تؤثر برامج مكافحة الفيروسات على الملفات القابلة للتنفيذ لعدد من البرامج. لذلك ، لإصلاح هذه المشكلة ، يتعين عليك تعطيل برنامج مكافحة الفيروسات التابع لجهة خارجية للتحقق مما إذا كان هو الجاني أم لا. يرجى ملاحظة أن تعطيل برامج مكافحة الفيروسات يمكن أن يؤدي إلى بعض التهديدات الخطيرة لجهاز الكمبيوتر الخاص بك عند الاتصال بالإنترنت.
يمكنك أيضًا الاعتماد على برنامج الأمان الخاص بـ Windows ، مثل Windows Defender . لديه نفس الوظائف مثل أي مضاد فيروسات آخر. يمكنك تعطيل الحماية من الفيروسات قبل الانتقال إلى لل إعدادات وتحويل الدرع خارج.

بعد تعطيله ، تحقق من الخطأ مرة أخرى. إذا استمرت المشكلة ، فانتقل إلى الطريقة التالية.
الطريقة الثانية: إصلاح السجلات
و التسجيل هو قاعدة بيانات مركزية من ويندوز التي يجري باستمرار يستخدمها جهاز الكمبيوتر الخاص بك للمساعدة في قراءة العديد من الملفات والإعدادات المختلفة التي يحتاجها لتشغيل. يمكن أن تتلف السجلات بسبب تلف بعض الملفات المطلوبة لتكديس كل شيء في مكانه. لذلك ، يوصي معظم الخبراء بالتأكد من الاحتفاظ بنسخة احتياطية من السجل الخاص بك والاحتفاظ بهذه النسخة الاحتياطية مخزنة على محرك أقراص USB تقليدي حتى تتمكن من إحياء السجل في الحالة السابقة في حالة حدوث تلف. ولكن ، إذا لم تقم بعمل نسخة احتياطية من السجل الخاص بك ، فاتبع هذه الخطوات لإصلاح السجلات من أجل حل الخطأ 0xc0000005 .
1. قم بتنزيل برنامج نظافة السجل من هذا الرابط .
2. بعد تنزيله ، قم بتثبيته باستخدام الإعدادات الموصى بها. افتح البرنامج بعد انتهاء عملية التثبيت.
3. في الواجهة ، انقر فوق علامة التبويب " التسجيل" الموجودة في الجزء الأيمن وانقر فوق الزر المسمى Scan for Issues . سيبدأ البحث عن الأخطاء في السجل وعندما ينتهي البحث ، سيتم تنشيط زر إصلاح المشكلة المحددة . انقر فوق هذا الزر وسيتم إصلاح كل شيء.

الطريقة رقم 3: إصلاح برامج التشغيل المعيبة
برامج التشغيل هي البرامج التي تساعد الكمبيوتر على الاتصال بالأجهزة المتصلة به. لذلك ، عند تلفها ، تميل الأجهزة إلى إحداث مواطن الخلل . يمكن أن يساعدك إصلاح هؤلاء الغواصين المعيبين في عدد من الطرق. اتبع الخطوات التالية.
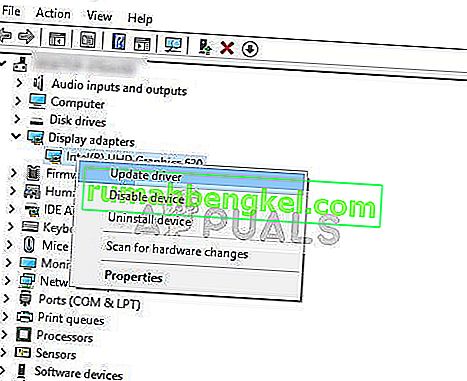
1. افتح إدارة الأجهزة عن طريق الضغط على وين + X واختيار من القائمة.
2. داخل Device Manager ، قم بالتمرير لأسفل لمعرفة ما إذا كان هناك أي جهاز بعلامة صفراء. إذا كان هناك ، فانقر بزر الماوس الأيمن هناك وحدد تحديث برنامج التشغيل . إذا كنت قد قمت بتثبيت برامج التشغيل مؤخرًا ، فأعد تثبيت برامج التشغيل هذه أيضًا.

3. في النافذة التي تظهر بعد ذلك ، انقر فوق " بحث" تلقائيًا عن برنامج التشغيل المحدث للسماح له بالبحث عن برامج التشغيل وتثبيتها تلقائيًا. في حالة إذا قمت بتنزيل برامج التشغيل يدويًا ، فانقر فوق الخيار أدناه لتصفحها وتثبيتها. بعد انتهاء العملية ، تحقق من الخطأ.

الطريقة رقم 4: إصلاح BCD
يتم تنفيذ هذه الطريقة من قبل المستخدمين على مسؤوليتهم الخاصة. لقد نجح هذا بالنسبة للبعض ولم ينجح مع البعض. ستحتاج أيضًا إلى إعادة تنشيط Windows بعد تنفيذ الخطوات الواردة في هذا الدليل.
- عقد مفتاح ويندوز و اضغط X . اختر موجه الأوامر (المسؤول)
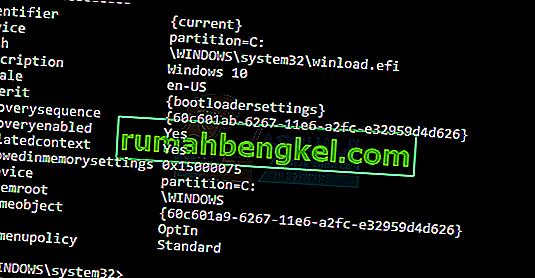
- اكتب “ bcdedit” واضغط على ENTER. إذا كان Windows Boot Loader Path هو xOsload.exe ، فأنت بحاجة إلى إزالة بعض الملفات وإصلاح BCD. يمكنك رؤية هذا في الحقل PATH بعد تنفيذ الأمر " bcdedit".
- بمجرد الانتهاء من ذلك ، قم بتنفيذ الأوامر التالية أدناه ، فقد يعود البعض غير موجود ولكن يتجاهل الأخطاء ويستمر حتى الأخير. تأكد من الضغط على المفتاح ENTER بعد كل أمر.

Del D: \ Windows \ System32 \ xOsload.exe Del D: \ Windows \ System32 \ xNtKrnl.exe Del D: \ Windows \ System32 \ Drivers \ oem-drv64.sys السمة c: \ boot \ bcd -h -r -s ren c: \ boot \ bcd.old bootrec / renbcd
الطريقة الخامسة: التحقق من وجود تحديثات Windows
غالبًا ما تحتوي تحديثات Windows على إصلاحات لبعض الأخطاء ومواطن الخلل ولكنها تشتهر أيضًا بإفساح المجال لمشكلات جديدة على أجهزة كمبيوتر الأشخاص. ومع ذلك ، في هذه الخطوة ، سوف نتحقق من وجود أي تحديثات لنظام التشغيل الخاص بك لأن Microsoft غالبًا ما تصحح أي مشكلات تأتي من تحديثاتها. للقيام بذلك ، اتبع الدليل أدناه.
- اضغط على "Windows" + "I" لفتح إعدادات Windows.
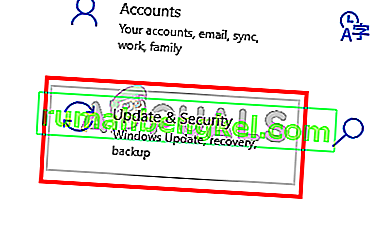
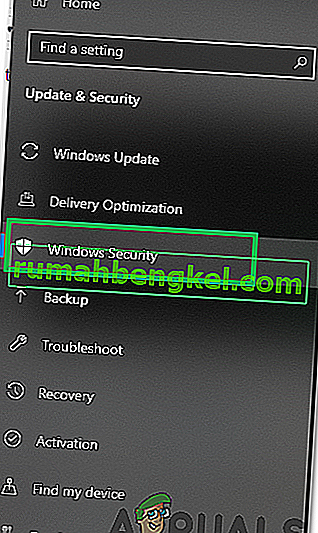
- في الإعدادات ، انقر فوق خيار "التحديثات والأمان" ومن الجانب الأيسر ، حدد خيار "Windows Update" .
- في الشاشة التالية ، انقر فوق خيار "التحقق من وجود تحديثات" وسيطلب من Windows تلقائيًا البحث عن أي تحديثات متاحة.

- بعد اكتمال التحقق من التحديث ، انقر فوق الزر "تنزيل" لبدء تنزيل التحديثات الجديدة وتثبيتها على جهاز الكمبيوتر الخاص بك.
- بعد تثبيت هذه التحديثات ، تحقق لمعرفة ما إذا كان القيام بذلك قد أدى إلى حل المشكلة على جهاز الكمبيوتر الخاص بك.


الطريقة 6: استعادة الكمبيوتر
إذا كنت قد بدأت للتو في الحصول على هذه المشكلة ، فقد يتم تشغيلها بسبب تثبيت برنامج تشغيل خاطئ أو حتى بسبب تطبيق مخادع ربما قمت بتثبيته على جهاز الكمبيوتر الخاص بك مؤخرًا. لذلك ، في هذه الخطوة ، سنعيد حالة الكمبيوتر إلى تاريخ سابق ونأمل أن يتم إصلاح مشكلتنا إذا كان ذلك بسبب الأسباب المذكورة أعلاه. من أجل القيام بذلك:
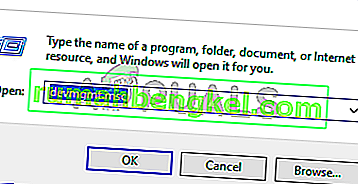
- اضغط على "Windows" + "R" لفتح موجه التشغيل.
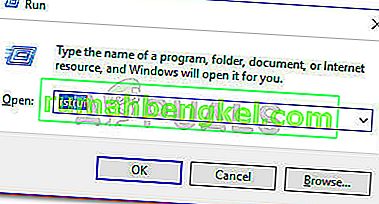
- اكتب "rstrui" واضغط على "أدخل" لفتح نافذة إدارة الاستعادة.
- انقر فوق "التالي" وحدد خيار "إظهار المزيد من نقاط الاستعادة" .
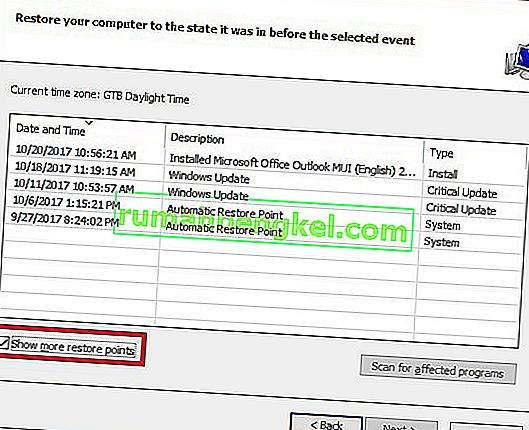
- حدد نقطة استعادة من القائمة تسبق تاريخ بدء حدوث هذه المشكلة.
- انقر فوق "التالي" مرة أخرى واتبع التعليمات التي تظهر على الشاشة لإعادة كل شيء إلى التاريخ المحدد.
- بعد اكتمال الاستعادة ، تحقق لمعرفة ما إذا كانت المشكلة لا تزال قائمة.


الطريقة 7: تمكين جدار الحماية
من الممكن في بعض الحالات ، أن يتم تشغيل الخطأ لأن التطبيق مشبوه أو على الأقل إذا تم وضع علامة عليه مشبوهًا وكان جدار حماية Windows لا يعمل على جهاز الكمبيوتر الخاص بك للتحقق من صحة هذا المريب. لذلك ، في هذه الخطوة ، سوف نتأكد من تمكين جدار حماية Windows من أجل التخلص من هذا الخطأ. من أجل هذا:
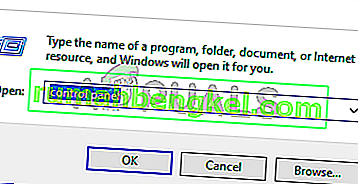
- اضغط على "Windows" + "R" لفتح موجه التشغيل.
- اكتب "Control Panel" واضغط على "Enter" لبدء تشغيل واجهة لوحة التحكم الكلاسيكية.
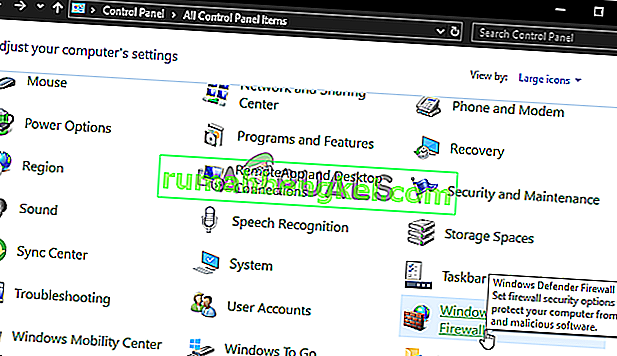
- في لوحة التحكم ، انقر فوق الخيار "عرض حسب:" وحدد الزر "رموز كبيرة" .
- بعد إجراء هذا التحديد ، انقر فوق خيار "جدار حماية Windows Defender" لتشغيل جدار الحماية ثم حدد "تشغيل أو إيقاف تشغيل جدار حماية Windows Defender".
- تأكد من التحقق من "تشغيل جدار حماية Windows Defender" لكلا الخيارين المتاحين لتشغيل جدار الحماية.
- بعد إجراء هذا التحديد ، احفظ التغييرات وأغلق خارج النافذة.
- بعد القيام بذلك ، تحقق لمعرفة ما إذا كانت المشكلة لا تزال قائمة.


الطريقة 8: قم بتشغيل SFC Scan
In some situations, you might’ve installed a bad driver on your computer or at some point, due to a storage failure, some system files or drivers might’ve been corrupted. Therefore, in this step, we will be running a complete system scan to identify any drivers that are missing signatures or to fix any abnormalities in the system files. For that:
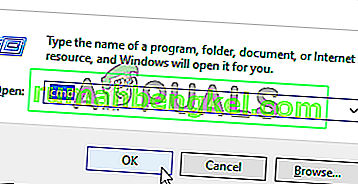
- Press “Windows’ + “R’ to open the Run prompt.
- Type in “cmd” and then press “Shift’ + “Ctrl” + “Enter” to provide admin permissions.Running the Command Prompt
- Type in the following command inside the command prompt and press “Enter” to execute it.
sfc /scannow
- Let the computer scan for any broken or corrupted items and it should automatically replace them with working ones.
- Check to see if doing so fixes the error message.

Method 9: Disabling Data Execution Prevention
Data Execution Prevention is a program that prevents certain programs or executables from being able to run on your computer because it suspects that they might be viruses. Due to this prevention, sometimes, as a false alarm, legit applications might also face issues while trying to run on your computer. Therefore, in this step, we will be disabling this setting from the system configuration panel. For that:
- Press ‘Windows’ + “R’ to open the Run prompt.
- Type in “Control Panel” and press “Enter” to launch the classical control panel interface.

- Inside the Control Panel, click on the “View By:” icon and then select the “Large Icons” option.
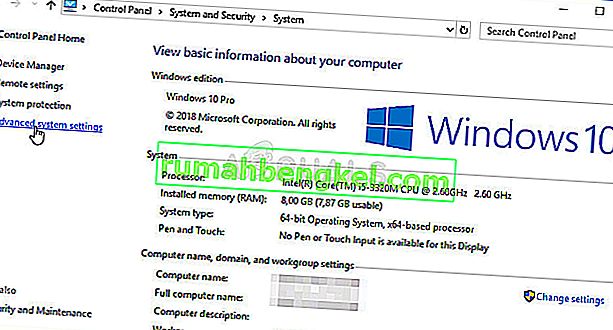
- After selecting Large Icons, select the “System” option.
- Click on the “Advanced System Settings” option on the left side of the screen.
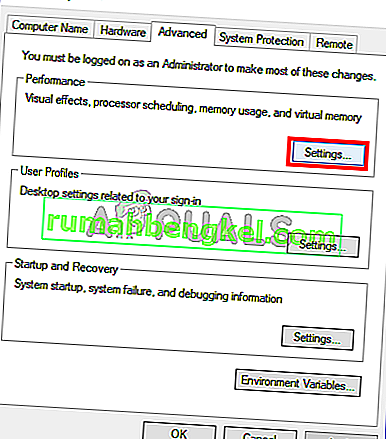
- In the advanced System Settings, click on the “Advanced” tab from the top.
- In the advanced tab, click on the “Settings” option under the “Performance” heading.
- On the next window that opens up, click on the “Data Execution Prevention” tab, and then select the “Turnon DEP for all programs except thoseI Select” option.
- After that, click on the “Add” option and point to the executable of the application that you are facing issues with.
- This way, that application will no longer come under the jurisdiction of the DEP program.
- Check to see if doing so has fixed the issue.


If the above process is unable to fix the issue, it might be because the executable isn’t the only one being affected by the DEP program. Sometimes the DEP might actually be preventing a herd of executables from being run on the computer and to counter this we will be disabling DEP completely.
Disabling DEP completely cannot be done through any Windows setting and it needs to be done manually through the command prompt. Remember to take this step as a last resort because this can in some cases makes your computer more vulnerable to viruses and malware attacks. In order to disable DEP through the command prompt:
- Press “Windows” + “R’ to open the Run prompt.
- Inside the Run prompt, type in “cmd” and then press “Shift” + “Ctrl” + “Enter” to launch in admin mode.
- Inside the command prompt, type in the following command and press “Enter” to execute it on your computer.
bcdedit.exe /set {current} nx AlwaysOff - Once the command has been executed, run the application that you want to and check to see if the error message still persists.
Method 10: Disable Firewall and Windows Defender
In some situations, the executable that you want to run on the computer might actually be blocked by the Firewall and it would not be able to make contact with its servers this way. Therefore, we will have to allow the executable in our Firewall for both public and private networks which should get it working if the Firewall is preventing it.
In addition to that, sometimes the Windows Defender might prevent the application from running on your computer because its local files might be suspicious and not properly signed. This can be due to a false alarm as well so we will be disabling the Windows Defender for the application as well by adding an exclusion. In order to do that:
- Press “Windows” + “R” to launch the Run prompt.
- Type in “ControlPanel” and press “Enter” to launch the classical control panel interface.
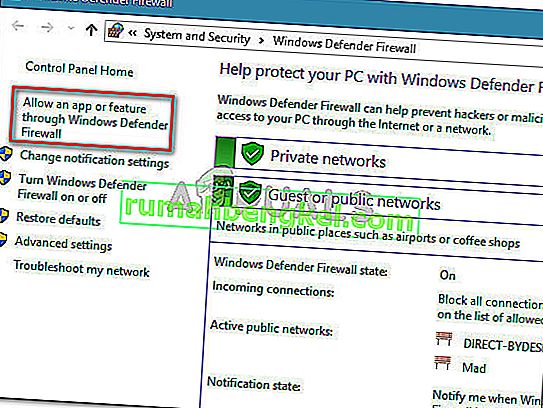
- Click on the “View by:” button, select “Large Icons” and then click on the Windows Defender Firewall option.
- Select the “Allow an app orfeature through the Firewall” button on the left pane and then click on the “Change Settings” button and accept the prompt.
- From here, make sure that you check both the “Public” and the “Private” options for the application and its entries.
- Save your changes and exit out of the window.
- After that, press “Windows” + “I” to launch the settings and click on the “Updateand Security” option.

- From the left pane, click on the “Windows Security” button and then click on the “Virus and Threat Protection” button.
- Select the “Manage Settings” button under the Virus and Threat Protection Settings heading.
- Scroll down and click on the “Add or Remove Exclusions” button in the next window.
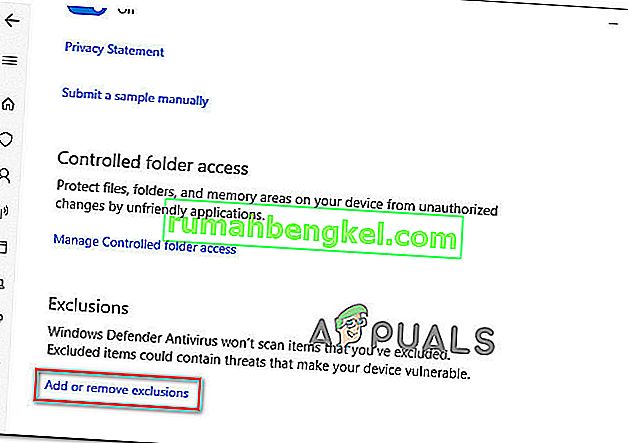
- Click on the “Add an Exclusion” option and select “Folder’ from the File type.
- Make sure to specify the application’s folder with which the issue is occurring and exit out of this window after saving your changes
- Check and see if doing so has fixed the error message.


Method 11: Reinstall Firefox
If you are getting this error while trying to launch Firefox, it might be occurring because the applications haven’t been installed properly on your computer. Therefore, in this step, we will be launching the app management window and uninstalling Firefox after which we will reinstall it completely by downloading it from the Firefox website. For that:
- Press “Windows” + “R” to open the Run prompt.
- Type in “appwiz.cpl” and press “Enter” to open the app management window.

- In the app management window, scroll down and right-click on the “Firefox” application.
- Select “Uninstall” from the list and then follow the on-screen instructions to remove the software from your computer.
- Repeat this step for all instances and bundled applications of the software installed on your computer.
- Make sure to disable any third-party antiviruses at this point to make sure that the software is installed smoothly.
- Head on over to the Mozilla website and click on the download button.

- Click on the downloaded executable and install it on your computer following the on-screen instructions.
- Check to see if doing so has fixed the error message on your computer.


Method 12: Scanning for Malware
It is possible in some cases that the computer has acquired malware that is preventing the user from being able to run all the system functions on their computer. Therefore, in this step, we will be using the default Windows Defender to scan our computer thoroughly for any viruses or malware that might’ve found its way on our computer. For that:
- Press the “Windows” + “I” keys simultaneously on your PC to open the Settings tab.
- Navigate to the Update& Security option and then click on the “Windows Security” button on the left tab.
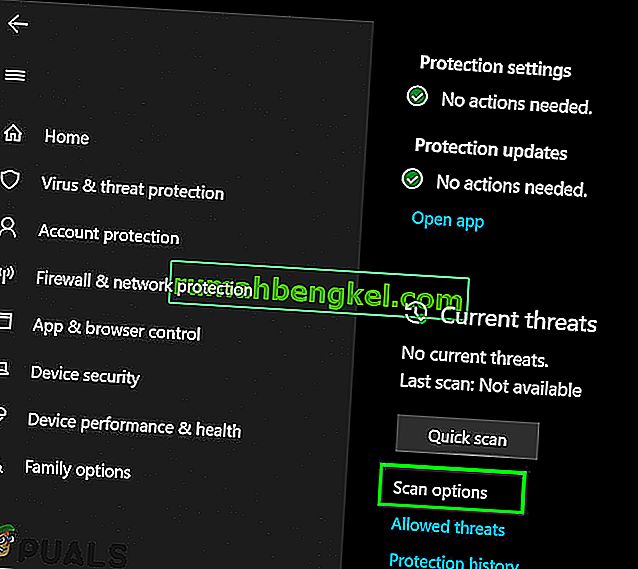
- After that, click on the “Open Windows Security” and select the “Virus and Threat Protection” option.
- After that, click on the “Scan Options” button below the “Quick Scan” window.
- Click on the “Full Scan” option and then hit the button of “Scan Now”.
- Wait for a few seconds while this process gets completed and then finally check if the error gets resolved now.


Microsoft Security Scanner is an additional tool that you can use to test the system for any further viruses and malware because sometimes the default tool isn’t able to perform the scan properly. Therefore, in this step, if the issue still hasn’t been resolved, we will be using the Microsoft Security Scanner to further make sure for any issues.
- Launch your browser and download the Microsoft Security Scanner from here.
- After downloading the executable, run it on your computer and let it install.
- Accept the License Agreement terms and click on “Next”.

- Select “Full Scan” and click on “Next”.
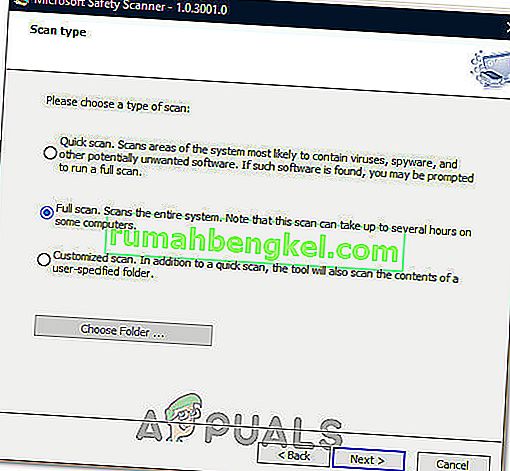
- After you opt for a full scan, the software will start scanning your entire computer to look for any malware or viruses that might’ve disguised themselves as normal executables or applications.
- After this scan has been finished, check to see if the error message still persists.


Method 13: Install Missing Drivers
It is possible in some situations that your device is missing certain drivers due to which this particular issue is being triggered on your computer. Therefore, we will be checking for any missing drivers and then we will check to see if the error is fixed. In order to do this, follow the guide below.
- Download Driver Easy on your computer.

- Run the downloaded executable and install the software on your computer.
- Run the check and see if there are any missing drivers on your computer.
- Install these missing drivers and then install them either manually or automatically using the Software.
- After installing all the missing drivers, check to see if the issue still persists.

Method 14: Reconfigure Registry
It is possible that in some cases, you haven’t properly configured all the registry settings or that you unknowingly configured something incorrectly. Therefore, in this step, we will be reconfiguring our Registry to fix a certain key that sometimes, if misconfigured, causes this particular error on Windows. In order to do this, follow the guide below.
- Press “Windows” + “R” to open the Run prompt.
- Type in “regedit” and press “enter” to launch the registry editor.

- Inside the registry editor, navigate to the following location.
HKLM\SOFTWARE\Microsoft\Windows NT\CurrentVersion\Windows\AppInit_Dlls
- Double click on the “LoadAppInit_DLLs” entry on the right side of the screen.
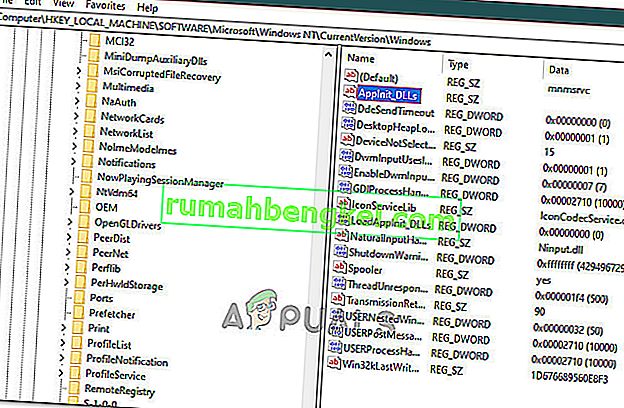
- Change the value of this registry from “1” to “0”.
- Save your changes and exit the registry editor.
- Check to see if doing so has fixed the error.


Method 15: Update Disk Drivers
In some cases, the Disk Drivers that are being used to control your Storage and other Disks installed on the computer might have been outdated due to which the error is being triggered. Therefore, in this step, we will first be opening the Device Management Window and from there, we will be updating these drivers. In order to do so, follow the steps mentioned below.
- Press “Windows’ + “R” to open the Run prompt.
- Type in “Devmgmt.msc” and press “Enter” to launch the device management window.
- In the Device Manager, double click on the “DiskDrives” option to expand it.
- Right-click on the storage device listed and select the “Update Driver” option.
- Select the “Search Automatically for Drivers” option and let the setup search.
- If there are any drivers available, Windows will automatically check for them and install them on your computer.
- Check to see if doing so has fixed the issue.


Method 16: Disabling Automatic Updates and Uninstalling Updates
It is possible in some cases, that this error is stemming from a faulty update install. Microsoft is notorious for pushing out updates that aren’t properly customized to work for all hardware combinations and often go on to break things instead of making them better. Therefore we will make sure that the recent update isn’t installed on our computer.
In order to do this, we will have to first disable automatic updates on our computer and then we will be uninstalling the recently installed updates. Make sure to back up any important data that you don’t want to lose just in case this goes bad.
- Press “Windows” + “R’ to open the Run prompt.
- Type in “service.msc” and press “Enter”.

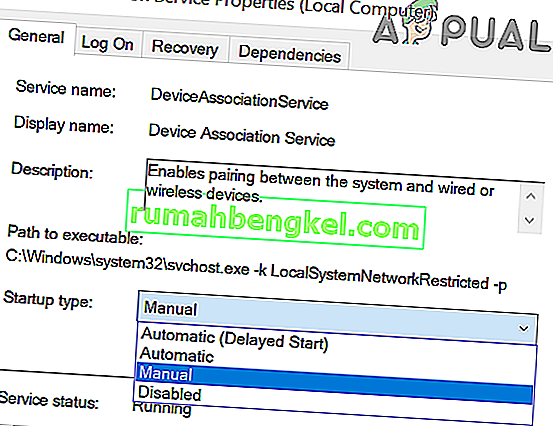
- Scroll through the list and double click on the “Windows Update” service.
- Click on the “Stop” button and then click on the “Startup Type” dropdown.
- Select “Disabled” from the list and select the “Apply” button from the window.
- Click on “OK” to close out of this window.
- Check to see if doing so has stopped your computer from updating.


After stopping the computer from updating, we will now be uninstalling the recent updates that have been installed on your computer. For that:
- Press “Windows” + “I” buttons to open the settings.
- In settings, click on the “Update and Security” option and then select the “Windows Update” button from the left pane.

- In the Windows Update, click on the “View Update History” option.
- In the Update History, click on the “Uninstall Updates” option and it should take you to the uninstallation screen where all the recently installed updates will be listed.
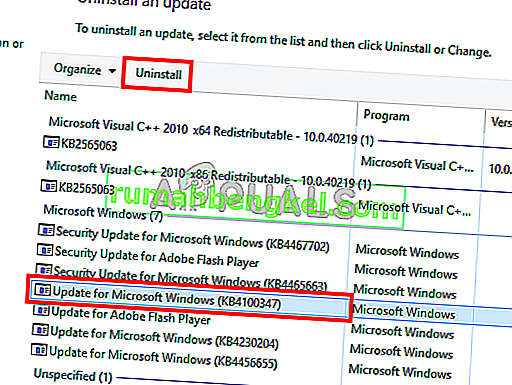
- From the list, right-click on the update that was installed recently and caused this error on your computer.
- Right-click on this update and select the “Uninstall” button to remove it completely from the computer.
- Follow through with the on-screen instructions.
- Check to see if uninstalling has fixed this issue.


Additional Fixes:
- In addition to some of the recommendations given above, you should try to check if there are any bad memory modules (RAM) installed on your computer which can be a cause of this.
- تأكد أيضًا من التحقق مما إذا لم تقم بزيادة سرعة ذاكرة الوصول العشوائي الخاصة بك إلى مستوى يتجاوز الحد الموصى به. إذا قمت بذلك ، فحاول إعادته إلى إعدادات المصنع الافتراضية وتحقق مما إذا كان ذلك سيؤدي إلى حل مشكلتك.