يعد Nord VPN أحد اللاعبين القدامى في عالم VPN ويعتبر تطبيق Windows الخاص به من بين الأفضل في عالم الكمبيوتر الشخصي. تعد Nord VPN شديدة التنوع إذا تم التحدث بها من حيث الوظائف والمرونة. بالإضافة إلى الدعم عبر الأنظمة الأساسية ، فإنه يحتوي أيضًا على خوادم مختلفة موجودة في بلدان مختلفة لتختار من بينها.

على الرغم من وجود التطبيق في السوق لفترة طويلة ، أبلغ المستخدمون أنهم غير قادرين على الاتصال بـ Nord VPN. إما أن يتوقف عن الاتصال بعد تحديث محتمل أو أن الطلب لخوادم DNS يرجع إما استجابة "انتهت المهلة".
ما الذي يسبب عدم اتصال Nord VPN؟
نظرًا لأن VPN تستخدم بنية الإنترنت الكاملة لنظام الكمبيوتر ، فهناك العديد من الأسباب التي تجعل Nord VPN الخاصة بك غير قادرة على الاتصال بشكل صحيح. وفيما يلي بعض من هذه.
- IPv6: يبدو أن Nord VPN لا تدعم بروتوكول IPv6 في أي من اتصالاتها. لذلك إذا تم تمكين هذا ، فقد لا تتمكن من الاتصال.
- برامج الجهات الخارجية: من المعروف أن برامج الجهات الخارجية تتعارض مع نظام البرامج وتتنافس على الموارد ؛ وبالتالي ، مما يتسبب في عدم الاتصال بشكل صحيح.
- محول الشبكة: نظرًا لأن نورد يستخدم محول شبكة منفصل للتواصل مع الإنترنت ، فمن الممكن أن يكون محول الشبكة لا يعمل بشكل صحيح وتحتاج إلى إعادة تشغيله.
- خطأ في الشبكة: في بعض الأحيان قد تكون تكوينات الشبكة على جهاز الكمبيوتر الخاص بك في حالة خطأ لا تسبب أي اتصال على الإطلاق. يمكننا محاولة تحديث جميع المتغيرات في هذه الحالة.
قبل أن نبدأ بالحلول ، تحتاج إلى التأكد من أن الإنترنت الخاص بك يعمل بالفعل . إذا كان الإنترنت الخاص بك لا يعمل بشكل صحيح ، فلن يتمكن Nord من إنشاء اتصال مناسب ويمنحك الوصول إلى شبكة أنفاق.
تأكد من أنك تستخدم شبكة خاصة (ليست المدرسة أو العمل أو الأماكن العامة مثل المستشفيات) ولا يوجد وكلاء. بمجرد التحقق مرة أخرى من أن الإنترنت يعمل بشكل جيد ، تابع.
الحل 1: تعطيل IPv6
IPv6 (بروتوكول إصدار الإنترنت 6) هو أحدث إصدار من IP في بنية الشبكات للكمبيوتر. بشكل افتراضي ، ما زلنا نستخدم IPv4 ولم ننتقل بعد إلى IPv6 بشكل دائم. ومع ذلك ، قد يكون هناك بعض منكم بدأوا في استخدام IPv6 للاتصال بالإنترنت. يبدو أن IPv6 لا يعمل بشكل صحيح مع Nord VPN. ومن ثم سنقوم بتعطيله والتحقق مرة أخرى.
- انقر بزر الماوس الأيمن على أيقونة الشبكة الموجودة في شريط المهام وحدد فتح إعدادات الشبكة والإنترنت . الآن انقر فوق الخيار تغيير خيارات المحول من الإعدادات.

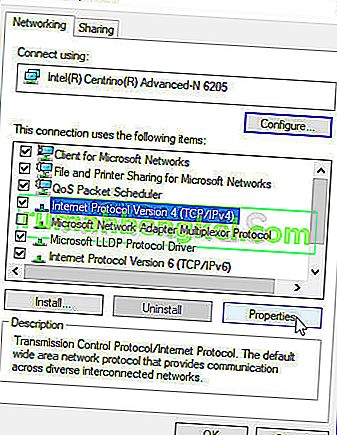
- بمجرد الدخول إلى إعدادات المحول ، انقر بزر الماوس الأيمن على المحول الذي تستخدمه وحدد خصائص .
- مرة واحدة في خصائص محول، قم بإلغاء في الإصدار IPv6 خيار وتأكد من أن يتم تمكين عناوين IPv4. حفظ التغييرات و الخروج. أعد تشغيل الكمبيوتر الآن وتحقق مما إذا كان الخطأ قد تم حله وأنك قادر على الاتصال بـ Nord VPN.

الحل 2: فحص تطبيقات الطرف الثالث
هناك العديد من التطبيقات والبرامج الأخرى التي يبدو أنها تتعارض مع Nord VPN في تشغيلها. إذا كان هناك أكثر من تطبيق يحاول الوصول إلى أحد الموارد ، فستكون هناك حالة سباق ولن تعمل كما هو متوقع.

يجب عليك إظهار مدير المهام (Windows + R و "Taskmgr") والتحقق من جميع التطبيقات التي تعمل في الخلفية. كان تطبيق Glasswire Elite أحد هذه التطبيقات المعروف أنه يسبب مشاكل . تأكد من إلغاء تثبيته أو التأكد من تعطيله عند محاولة الاتصال بـ Nord VPN.
ملاحظة: يمكنك أيضًا محاولة تنظيف جهاز الكمبيوتر. سيؤدي هذا إلى تعطيل جميع تطبيقات الجهات الخارجية الخارجية وتشغيل التطبيقات الضرورية فقط. الآن يمكنك محاولة إنشاء اتصال. إذا كنت ناجحًا ، فهذا يعني أن هناك بعض التطبيقات التي تسبب المشكلة. يمكنك العودة عن طريق تمكين كل تطبيق والتحقق مرة أخرى.
الحل 3: تغيير موقع الخادم
يمنح Nord VPN المستخدمين خيار تحديد موقع الخادم الخاص بهم. هذه الخوادم منتشرة في جميع أنحاء العالم وتوفر الاتصال وفقًا لموقعها الجغرافي ، أي أنه من المتوقع أن يكون الخادم الأقرب إليك أسرع. سنحاول تغيير موقع الخادم الذي تحاول الاتصال به ومعرفة ما إذا كان هذا يحل مشكلة عدم الاتصال.
- قم بتشغيل Nord VPN وانقر فوق عنوان الخوادم الموجود في الجزء العلوي من التطبيق.

- حدد الآن خادمًا مختلفًا عن ذي قبل وبعد التحديد ، حاول تشغيل VPN مرة أخرى. إذا واجهت نفس السلوك ، فحاول اختيار خادم آخر واختبر الشبكة على موقع ويب آخر.
الحل 4: إعادة تشغيل محول الشبكة / TAP
يقوم Nord VPN بإنشاء محول شبكة ظاهري على جهاز الكمبيوتر الخاص بك والذي يمكنه استخدامه لتوصيل المعلومات. إنه بمثابة جسر يقوم فيه Nord VPN بتعديل الإعدادات حتى يتمكن من بدء اتصال VPN والحفاظ عليه. يحدث هذا أحيانًا في حالة خطأ تؤدي إلى عدم الاتصال بخادم VPN الخاص بك. سنقوم بإعادة تشغيل المحول بشكل صحيح والذي سيتأكد من إعادة بدء جميع التكوينات الخاصة به.
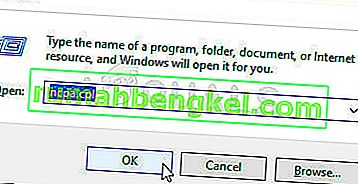
- اضغط على Windows + R ، واكتب " ncpa. cpl "في مربع الحوار واضغط على Enter.
- سيتم سرد جميع محولات الشبكة أمامك. حدد محول TAP ، وانقر فوقه بزر الماوس الأيمن وحدد تعطيل .

- بعد تعطيله ، انتظر لمدة دقيقة. ثم انقر بزر الماوس الأيمن فوقه مرة أخرى وحدد تمكين . حاول الآن توصيل Nord VPN ومعرفة ما إذا كانت هذه هي الحيلة.
الحل 5: تنظيف مكدس الشبكة
هناك أمثلة لا حصر لها حيث يؤدي مسح (تحديث) مكدس الشبكة على جهاز الكمبيوتر الخاص بك إلى حل العديد من المشكلات المتعلقة بشبكات VPN (بما في ذلك Nord). ستعمل هذه العملية على مسح إعدادات DNS و IP الخاصة بك والتأكد من عدم وجود إعدادات غير صحيحة قد تتعارض مع التطبيق.
- اضغط على Windows + S ، واكتب "موجه الأوامر" في مربع الحوار ، وانقر بزر الماوس الأيمن على التطبيق وحدد تشغيل كمسؤول .
- بمجرد وصولك إلى موجه أوامر غير مقيد ، قم بتنفيذ الأوامر التالية واحدة تلو الأخرى متبوعة بالمفتاح Enter بعد كل أمر:
ipconfig / release ipconfig / flushdns ipconfig / تجديد netsh winsock reset netsh interface ipv4 reset netsh interface ipv6 reset netsh winsock reset index netsh int ipv4 reset .log netsh int ipv6 reset .log

- أغلق الآن موجه الأوامر وحاول تشغيل Nord VPN مرة أخرى. تحقق مما إذا كان يمكنك الاتصال به بشكل صحيح.
الحل 6: إعادة تثبيت Nord VPN (مع محول TAP)
إذا لم تنجح جميع الطرق المذكورة أعلاه ، فأنت بحاجة إلى التأكد من أن تثبيت Nord الخاص بك صحيح ولا يوجد خطأ في ملفات التثبيت. سيتم أيضًا إعادة تثبيت محول TAP في هذه العملية لأن Nord VPN يدير المحول وهو مخصص لاستخدامه فقط. تأكد من تسجيل الدخول كمسؤول. إذا لم تنجح إعادة التثبيت ، فتأكد من صحة بيانات الاعتماد الخاصة بك التي تقوم بإدخالها إلى الخدمات التي لم تنته صلاحيتها.
- اضغط على Windows + R ، واكتب "appwiz.cpl" في مربع الحوار واضغط على Enter.
- بمجرد دخولك إلى مدير التطبيق ، ابحث عن إدخال Nord VPN من القائمة ، وانقر بزر الماوس الأيمن فوقه وحدد إلغاء التثبيت .

- أعد تشغيل الكمبيوتر الآن وقم بتنزيل التطبيق مرة أخرى من موقع Nord VPN الرسمي. الآن بعد إدخال بيانات الاعتماد الخاصة بك ، حاول الاتصال مرة أخرى وتحقق مما إذا كان يمكنك إنشاء اتصال VPN بشكل صحيح.
الحل 7: استخدام خدمة VPN بديلة
هناك العديد من عملاء VPN في سوق Windows. ومع ذلك ، نوصي أو القراء بتجربة CyberGhost. خدمة VPN هذه بسيطة كما هي وتوفر لك أيضًا خوادم موجودة في بلدان مختلفة. حتى أنه يحتوي على خوادم VPN منفصلة لبث Netflix و BBC بسهولة. اتبع الخطوات أدناه لتنزيل التطبيق وتأمين اتصالك في أسرع وقت.
- قم بتنزيل CyberGhost من (هنا).

- بعد تنزيل VPN ، قم بتثبيته على جهاز الكمبيوتر الخاص بك. قد يُطلب منك الأذونات المناسبة. تأكد من تسجيل الدخول كمسؤول واضغط على نعم لجميع الأذونات المطلوبة.
- بعد تثبيت CyberGhost على جهاز الكمبيوتر الخاص بك ، قم بتشغيله . هنا سترى قائمة بالخوادم المختلفة المتاحة جنبًا إلى جنب مع المسافة من موقعك الفعلي (المزيد من المسافة يعني الإنترنت البطيء).

- بعد تحديد الخادم ، انقر فوق زر الطاقة الموجود على الجانب الأيمن من التطبيق. يمكنك أيضًا تحديد خوادم مخصصة لأنشطة التورنت والبث المباشر (موجودة في جزء التنقل الأيمن).
الحل 8: تعطيل جدار الحماية
In some cases, the default Windows Firewall might be preventing the application from working properly. Therefore, in this step, we will first be allowing it through the Firewall and make sure that it isn’t blocked by the Firewall and then we will also make sure that Windows Defender has it added as an exception. For that:
- Press “Windows” + “R” to launch the Run prompt.
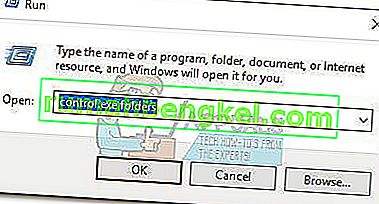
- Type in “ControlPanel” and press “Enter” to launch the classical control panel interface.

- Click on the “View by:” button, select “Large Icons” and then click on the Windows Defender Firewall option.
- Select the “Allow an app orfeature through the Firewall” button on the left pane and then click on the “Change Settings” button and accept the prompt.
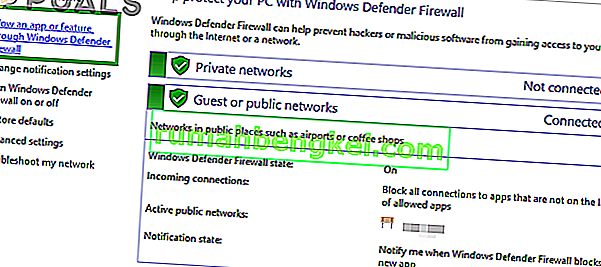
- From here, make sure that you check both the “Public” and the “Private” options for Nord VPN and its related applications/drivers.
- Save your changes and exit out of the window.
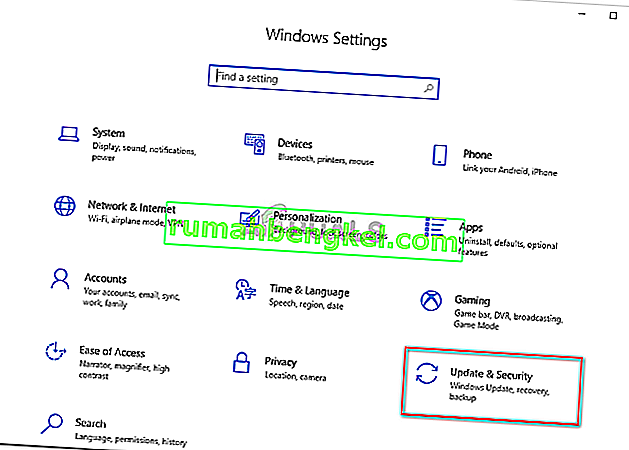
- After that, press “Windows” + “I” to launch the settings and click on the “Updateand Security” option.
- From the left pane, click on the “Windows Security” button and then click on the “Virus and Threat Protection” button.
- Select the “Manage Settings” button under the Virus and Threat Protection Settings heading.
- Scroll down and click on the “Add or Remove Exclusions” button in the next window.
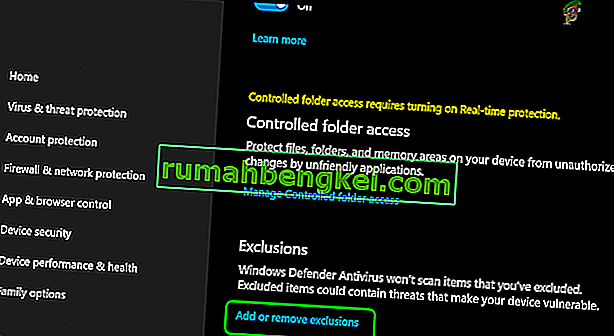
- Click on the “Add an Exclusion” option and select “Folder’ from the File type.
- Make sure to specify the Nord VPN folder and exit out of this window after saving your changes
- Check and see if doing so has fixed the issue with Nord VPN not connecting.


Solution 9: Change NordVPN Protocol
It is possible that Nord VPN might be running into issues while trying to connect to its servers due to the protocol configuration in its settings. If one type of protocol isn’t working for you, it is always recommended to try and switch to the other protocol to make sure that the issue isn’t tied to the wrong selection of the protocol type automatically or manually. For that:
- Launch NordVPN and make sure to disconnect from any currently active sessions.
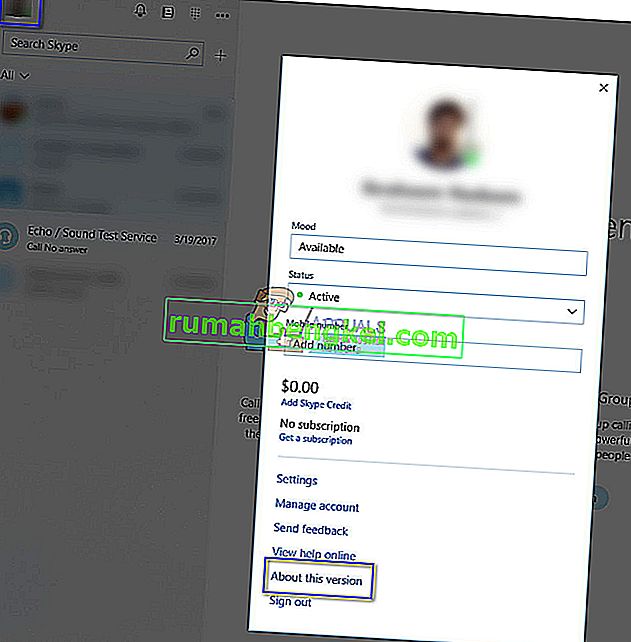
- Click on the “Gear” icon on the top right corner and go into the settings.
- Click on the “Advanced” option from the left-hand side menu.
- Click on the “Protocol” dropdown and check on “TCP”.
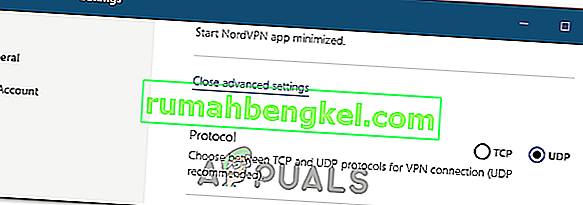
- This should change your protocol from TCP to UDP.
- Check to see if doing so fixes the issue for your computer.
- To Verify that none of the protocols work, make sure to repeat the steps and select “UDP” instead of TCP and then check again.
- If none of the selected protocols are able to make a connection with the server, move on to the other fixes.

Solution 10: Changing DNS Server Configuration
DNS Servers are used by the computer to establish a stable and secure internet connection with other sites on the internet, however, if the computer is unable to detect the DNS settings properly, or if the selected DNS server is facing outage, Nord VPN might not connect properly. Therefore, in this step, we will be changing the DNS configuration to ensure that DNS isn’t an issue. For that:
- Press “Windows” + “R” to launch the Run prompt.
- Type in “ncpa.cpl” and press “Enter” on the keyboard to launch the network configuration panel.
- Right-click on your internet connection and select the “Properties” option.
- Double click on the “Internet Protocol Version4 (TCP/IPV4)” option and check on the “Use the following DNS addresses” button.
- At first, type in “8.8.8.8” and “8.8.4.4” in the primary and the secondary DNS addresses field respectively and click on “OK”. After that, check to see if NordVPN is connecting, if it isn’t, try to use “103.86.96.100” and “103.86.99.100” in the primary and the secondary fields respectively.
- Check to see if you are able to make a connection by selecting those DNS servers.


Solution 11: Opening Ports
For some people, the issue might arise if the ports that NordVPN uses to communicate with its servers are being blocked by your router. For security reasons most routers often block ports used by VPN/Network Tools to prevent any alterations to your connections and if that is the case, we will have to open the ports by logging in to the router’s control panel. For that:
- Press “Windows” + “R” to launch the Run prompt and type in “cmd” and then press “Ctrl” + “Shift’ + “Enter” keys on your keyboard to provide admin permissions.

- Type in the following command in the command prompt to list the IP information.
ipconfig /all
- The computer will list all the information of the network adapters connected to your computer.
- Under the default gateway option, after the mac address, there should be an IP address that should look something like “192.168.x.x”.
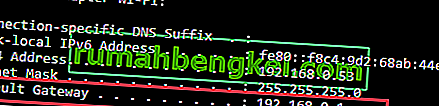
- Copy this IP address and launch your browser.
- Paste the IP address within a new tab on the browser and press “Enter” to navigate to the browser’s login page.
- Once on the login page, log into the control panel with your credentials, both of which, i.e the username and password should be written on the back of your internet router. If not, then the username should be admin and the password should be the Wifi password that you use to connect your devices.
- After logging into the Control panel, look around for a “NAT” or “Port” option that allows you to forward ports.
- Type in “500” and select “UDP” from the list.
- Click on “Save” to forward the 500 UDP port and exit out of the control panel after the change has been made.
- Try connecting with Nord VPN and check to see if the issue persists.


Solution 12: Use Hotspot
Mostly, this error can be fixed simply by employing your mobile’s hotspot connection instead of the Wifi or the Wired connection that you are already using on your computer. This does seem an inconvenience for Data conscious people but it seems to be the only way some people are able to connect through Nord VPN as some routers block it completely.
Note: In addition to this, you can try to change the firmware on your router to avoid any permanent blocks put from the router or to eliminate any bugs with the connection.